
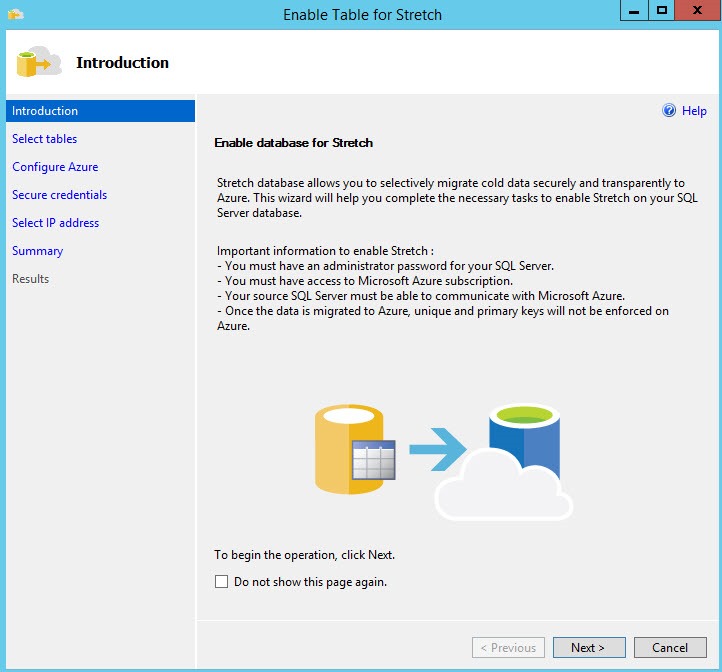
Stretch Database in SQL Server 2016 RTM
Back in August 2015, I wrote an article introducing the new Stretch Database feature in SQL Server 2016. In that article, I discussed how to get started with Stretch Database in SQL Server 2016 Community Technology Preview 2 (CTP2). SQL Server 2016 was released on June 1st 2016, and there have been numerous updates to the product. The method of setting up Stretch Database has changed slightly as well as some of the features.
Beginning with SQL Server 2016 we gained the ability to store portions of a database in an Azure SQL Database. In earlier previews when you enabled Stretch for a database, you had to migrate the entire table, with the RTM release of SQL Server 2016, you can now chose a portion of a table. Once you enable stretch for a table, it will silently migrate your data. If you are not familiar with Stretch Database, it leverages the processing power in Azure to run queries against the remote data by rewriting the query. You do not have to rewrite any queries on your end. You will see this as a “remote query” operator in the query plan.
An easy way to identify databases and tables that are eligible for being Stretch-enabled is to download and run the SQL Server 2016 Upgrade Advisor and run the Stretch Database Advisor. Aaron Bertrand (@AaronBertrand) wrote about this awhile back. The Upgrade Advisor has changed slightly since Aaron’s post, however the process is mostly the same:
Limitations for Stretch Database
Not all tables will be eligible for being Stretch-enabled. Certain table properties, data and column types, constraints, and indexes are not supported, such as:
- Memory-optimized and replicated tables
- Tables that contain FILESTREAM data, use Change Tracking or Change Data Capture
- Data types such as timestamp, sql_variant, XML, or geography
- Check or default constraints
- Foreign key constraints that reference the table
- XML, full-text, spatial, or clustered columnstore indexes
- Indexed views that reference the table
- You cannot run UPDATE or DELETE statements, or run CREATE INDEX or ALTER INDEX operations on a Stretch-enabled table
For a full listing of limitations, you can visit: Requirements and limitations for Stretch Database.
Setting up Stretch Database
Getting started with the RTM release is a bit different than the earlier previews. You’ll need an Azure account, and then you must enable Stretch Database on the local instance.
To enable Stretch Database on an instance, run:
EXEC sys.sp_configure N'remote data archive', '1';
RECONFIGURE;
GO
For this demo I’m going to use a sample database that I have created called STRETCH. I started by right clicking on the database, choosing Tasks, Stretch, and then chose Enable. This was using SQL Server 2016 Management Studio.
The next screen offers you which tables you'd like to enable for Stretch:
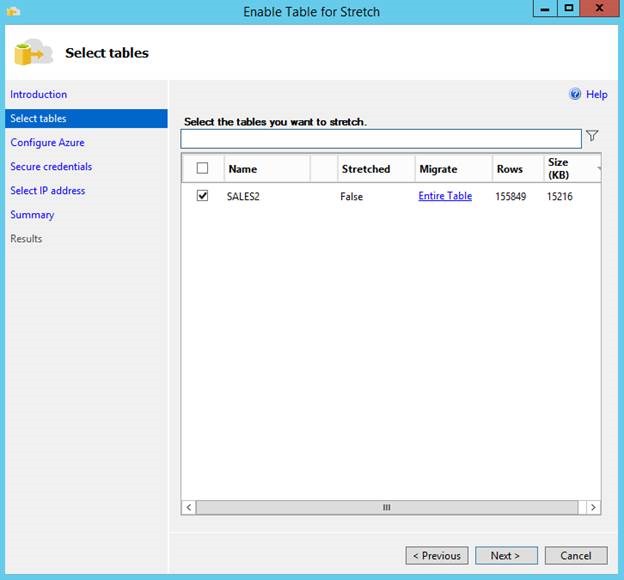
I chose the SALES2 table. The wizard defaults to “Entire Table,” but you can also change that option to migrate a subset of rows.
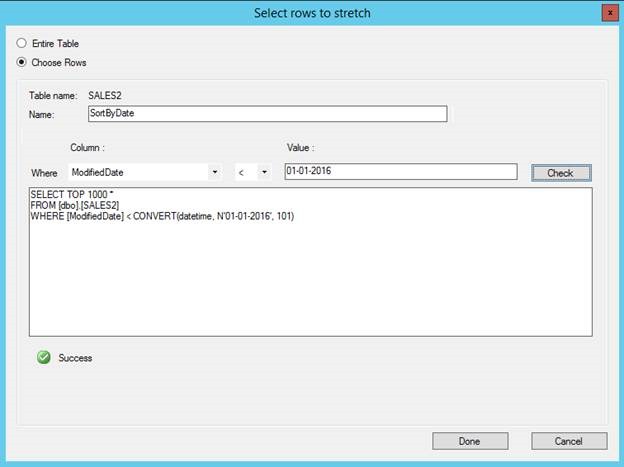
If you choose by rows, you have to select a name for your criteria, and then you can choose which column to use in your where statement, as well as the condition and value. In this screen shot I chose rows prior to 2016. Being able to choose a portion of a table is a huge improvement over the earlier previews, which only allowed you to stretch the entire table. For simplicity, in this demo, I am going to migrate the entire table, so I clicked Cancel, and then Next.
Once you have your tables and conditions selected, you have to choose which Azure subscription you are going to use, your Azure region, and your server information.
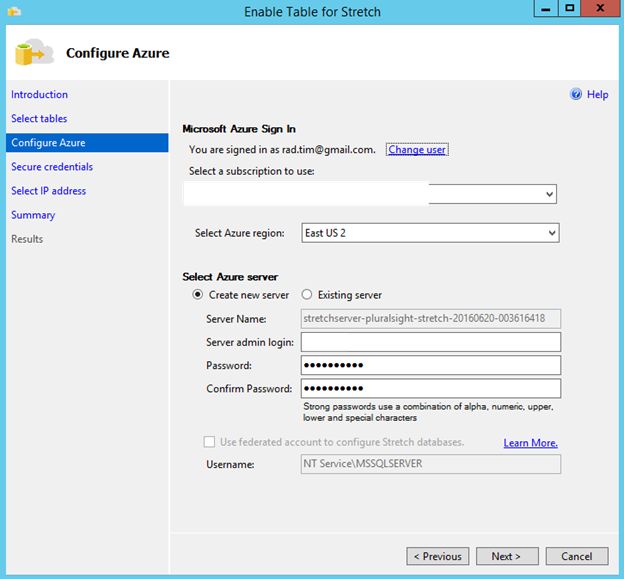
Once you have entered the required information, click Next.
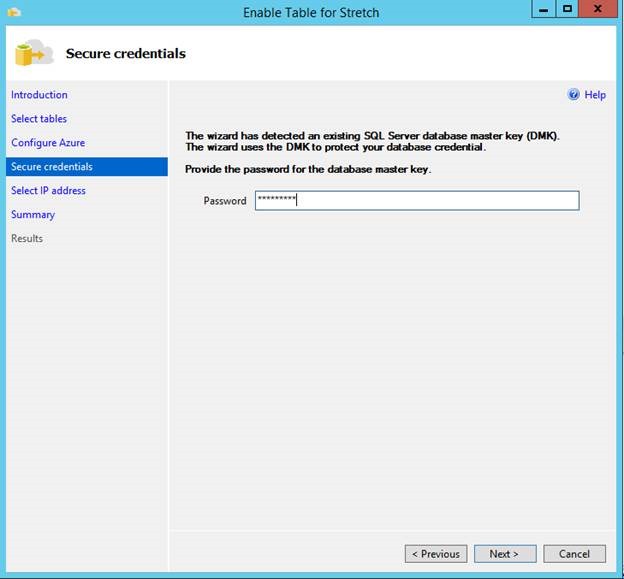
A new enhancement is using the database master key to protect the Azure credentials to connect to Azure. If you do not have a master key already, you will be prompted to create one, if you already have one, you will need to provide the password. Click Next.
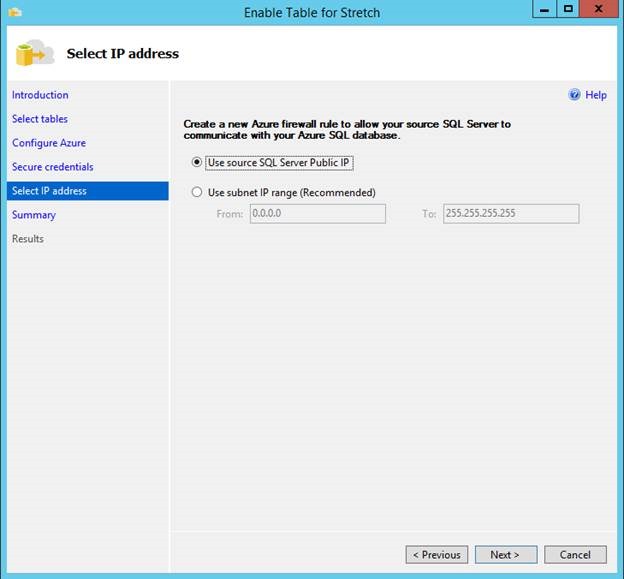
You will need to create a firewall rule for your server, or you can enter a subnet IP range. Make your selection and click Next.
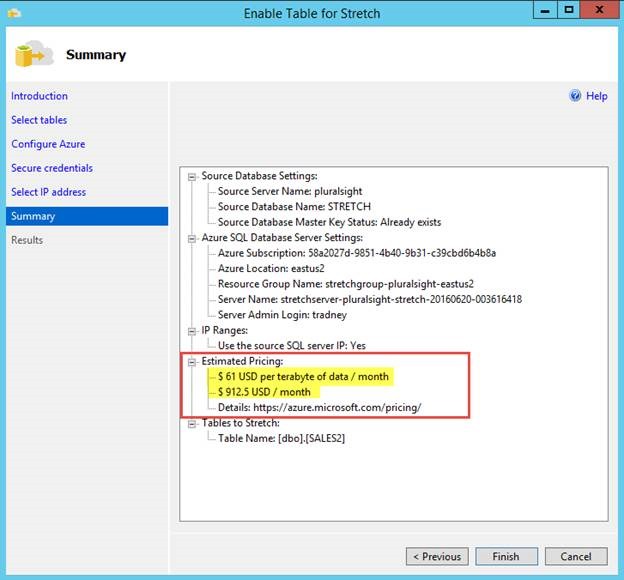
This is where things have really changed, and will make me reconsider using this feature. Microsoft has created a Database Stretch Unit (DSU) so that you can scale up or down the level of performance that you need for Stretch data. As of June 2016, current pricing is billed for both compute and storage, which you see represented in the image above. For my 15MB table that was migrated, I would be charged $61 USD per month for storage, as well as the minimum DSU level (100) at $912.50 per month. DSU levels range from:
| DSU level | Hourly cost | Max monthly cost (months with 31 days) |
|---|---|---|
| 100 | $1.25 | $930 |
| 200 | $2.50 | $1,860 |
| 300 | $3.75 | $2,790 |
| 400 | $5.00 | $3,720 |
| 500 | $6.25 | $4,650 |
| 600 | $7.50 | $5,580 |
| 1000 | $12.50 | $9,300 |
| 1200 | $15.00 | $11,160 |
| 1500 | $18.75 | $13,950 |
| 2000 | $25.00 | $18,600 |
Why did the wizard tell me only $912.50, when the price sheet indicates it should be $900 for June (or pro-rated based on how many days are left in June)? Your guess is as good as mine; I've tried various math stuff and came up blank. You can learn more about the pricing models here:
Prior to learning about this new billing method for DSU, I could make the argument that using Stretch Database would be a very cost effective method for storing cold data (unused data) into the cloud. By stretching this data into Azure, you could migrate a large portion of older data, which would decrease the size (and thus cost) of your local backups. In the event you had to restore a database, you would simply have to establish the connection to Azure for the stretched data, thus eliminating the need to restore it. However, with the minimal cost being nearly $1,000 per month for the low end DSU scale, many organizations will find that it is much cheaper to retain the data on a less expensive tier of storage within their data center and find other methods for HA such as mirroring, log shipping, or Availability Groups.
Click Finish to begin the migration.
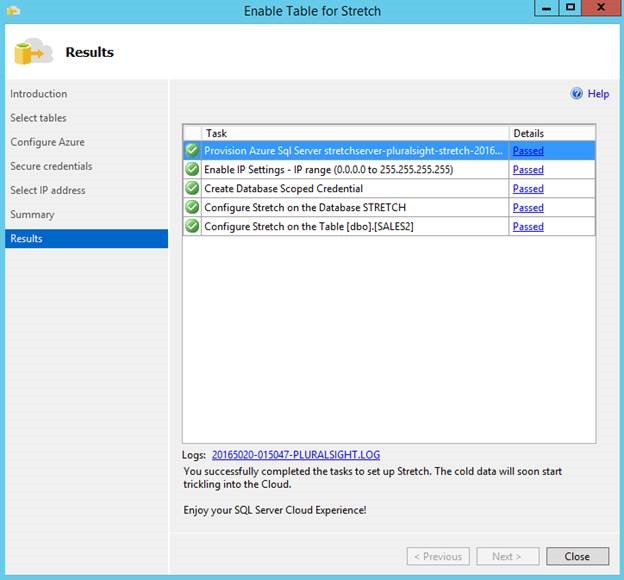
Congratulations, I have now migrated the SALES2 table to an Azure SQL Database
Disable a Stretch table
In the early previews of Stretch Database, if you wanted to disable a Stretch table, you would have to create a new table and insert the stretch data into it. Once all data was copied, then you would have to either manually switch out the tables by renaming them, or manually merging the stretched data back into the production table. With the RTM release, you can still manually handle the migration, chose to leave the data in Azure, or chose an option to bring data back from Azure.

Regardless of which method you use to bring the data back, you incur data transfer charges.
Backup and Restore of a Stretch Database
Once you migrate data into a Stretch Database, Azure handles the backup of the Stretch data. Backups occur with a snapshot taken every 8 hours and the snapshots are maintained for 7 days. This gives you up to 21 points-in-time over the previous 7 days to restore.
You don’t have to make any changes to your current local backup routines. Any local backups taken will contain all local data and eligible data that has not yet been migrated. This is referred to as a shallow backup and doesn’t contain any data already migrated to Azure.
DBCC CHECKDB
You also cannot run CHECKDB against data that has been migrated to Azure.
When I ran DBCC CHECKDB on my STRETCH database prior to migration I got the following results for the SALES2 table:
There are 45860 rows in 1901 pages for object "SALES2".
After the migration, I received the following output for the SALES2 table (emphasis mine):
There are 0 rows in 1901 pages for object "SALES2".
You can run DBCC CHECKDB against Azure SQL Database, however due to not being able to connect directly to the stretched Azure SQL Database, you currently cannot manually run DBCC CHECKDB against the stretched data specifically. I cannot find any documentation that states Azure is performing any consistency checks against these databases.
This brings up a significant risk in my opinion.
Summary
Stretch Database is an easy way to migrate archive data to Microsoft Azure, if your database supports it. Currently in SQL Server 2016 RTM there are many limitations with table, data, and column properties, data and column types, constraints, and indexes. If you are not restricted by those limitations, then Stretch Database is a simple way to migrate historical data to Azure SQL Database to free up local storage and decrease restore times of those databases if the expense makes it worthwhile. You also need to be comfortable, at least for now, with not being able to run DBCC CHECKDB against any migrated data. Managing restores will be a bit trickier too with having to restore the connection between the SQL Server database and the remote Azure database.
6 thoughts on “Stretch Database in SQL Server 2016 RTM”
Comments are closed.

Appreciate the article, but this feature is dead-in-the-water with that list of restrictions and the cost.
Yeah, I agree, the cost really surprised me
I find the last section quite alarming. Then again thinking about it how can they create a snapshot when parts of your DB is on Azure storage?
I'm interested in the limitation you note: "You cannot run UPDATE or DELETE statements, or run CREATE INDEX or ALTER INDEX operations on a Stretch-enabled table." That sounds suuuuper limiting.
I didn't think it was quite that bad, but I haven't played with this feature much.
My understanding was that you can run update and delete statements, but not for rows which have been moved to stretch storage or which qualify to be moved based on the function.
I also thought there was a way to create indexes. (The books online article on limitations just says, "You can't create an index for a view that includes Stretch-enabled tables." and "Filters on SQL Server indexes are not propagated to the remote table.")
Is it really that bad?
I do not have an Azure account hence unable to verify, but recall a limitation on database collation.
I'm wondering if you can stretch a database of any collation to Azure?
Thanks.
I have tested this a bit and many disallowed operations are possible if you directly connect to the 'stretch' SQL Database in Azure…