Having a standardized build checklist for a new SQL Server instance can help ensure that you do not forget any important steps or configuration settings as you install SQL Server, get it updated, and get it properly configured. This is very important in order to make sure you get the best performance and scalability out of your SQL Server instance.
My Pluralsight course, SQL Server 2012 Installation and Configuration, goes into even more detail about this process. The general framework is below:
- Rack and cable the server
- Make sure each power supply is plugged into a different power circuit
- Make sure network cables are plugged into different network switches if possible
- Request a regular domain account for the SQL Server Service and for the SQL Server Agent Service (along with any other SQL Server services you will be using, such as SSIS, SSRS, SSAS)
- You will need to know the user name and password for these accounts during the SQL Server 2012 installation
- Try to have these accounts use passwords that do not expire
- Check the main BIOS settings on the server
- Hyper-threading and turbo-boost should be enabled
- Power management should be set to OS control
- Memory testing should be disabled
- Install Windows Server 2012 R2 Standard Edition on the server
- Use two internal drives in RAID 1 with the integrated RAID controller
- Consider using SSDs for this purpose, if possible
- If you use SSDs, you do not need to defragment them
- Create a single partition, C: drive that uses all of the space
- Change the windows page file size to 16GB, using the C: drive
- Change the Windows power plan to “High Performance”
- Run CPU-Z on the server to confirm that the processors are running at full speed
- Change the drive letter for the optical drive to Z:
- Use two internal drives in RAID 1 with the integrated RAID controller
- Change the NETBIOS name on the server to the desired permanent name of the server
- Install the .NET 3.51 feature from Windows Server 2012 R2
- Install Microsoft Update on the server
- This is a superset of Windows Update
- Install all Microsoft and Windows Updates on the server
- This may require several rounds to get all of the required updates
- Manually defragment the C: drive
- Enable automatic defragmentation of the C: drive using the default weekly schedule
- Do not allow new drives to be automatically added to the schedule
- Create a static IP address with the correct DNS and default gateway information
- Join the server to the appropriate Windows domain
- Activate Windows on the server
- Install the latest version of Dell OMSA on the server
- Download the latest version of the Dell Server Update Utility (SUU)
- Mount the .iso for the SUU, and run the SUU
- This will ensure that you have the latest firmware and drivers for the server
- Use Dell OMSA to create RAID arrays for LUNs
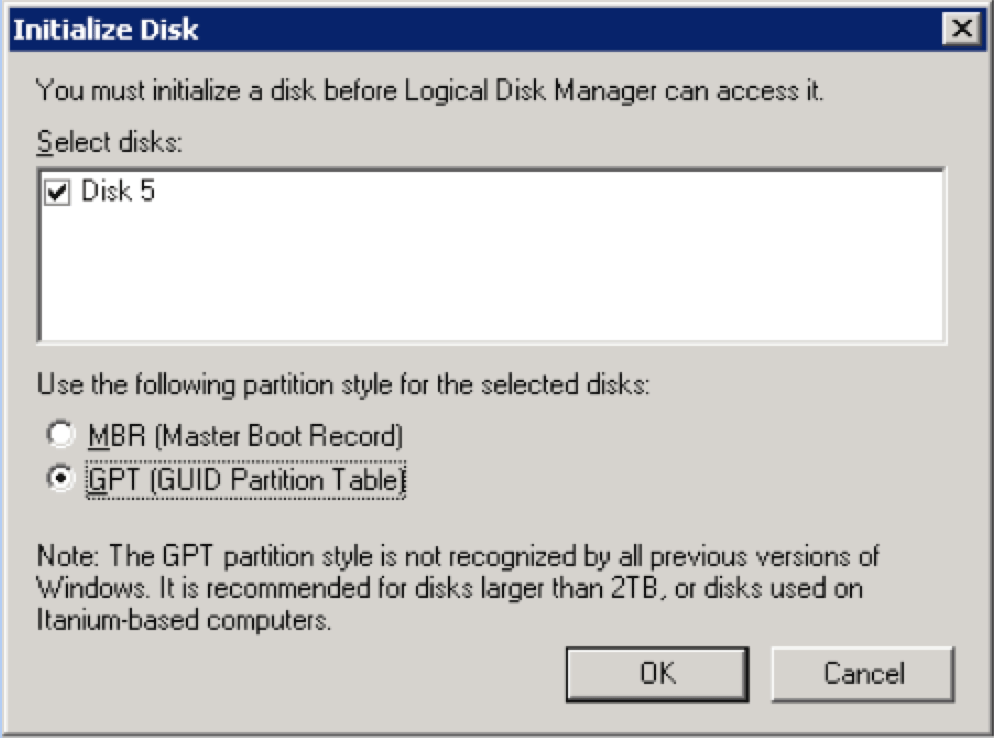
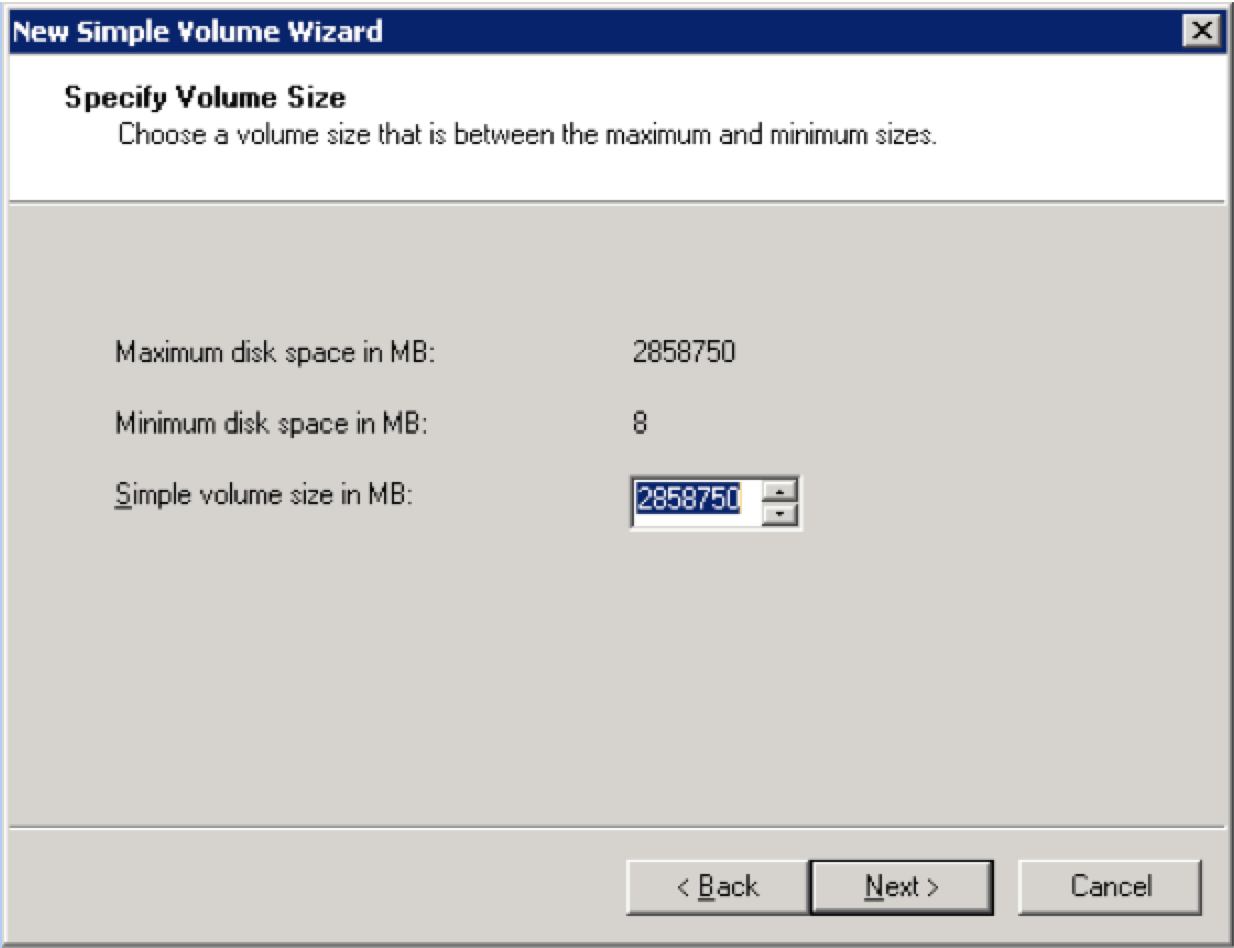
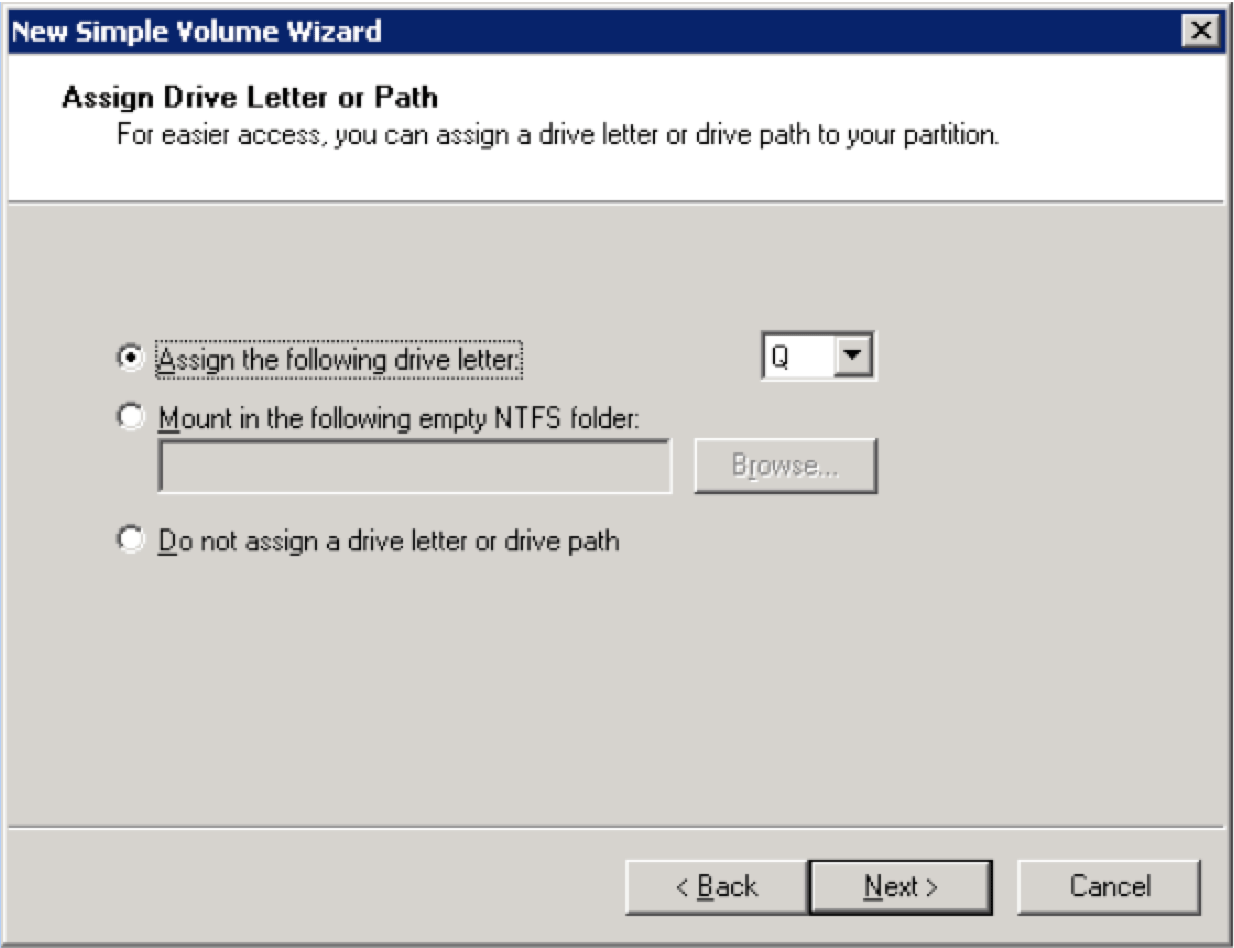
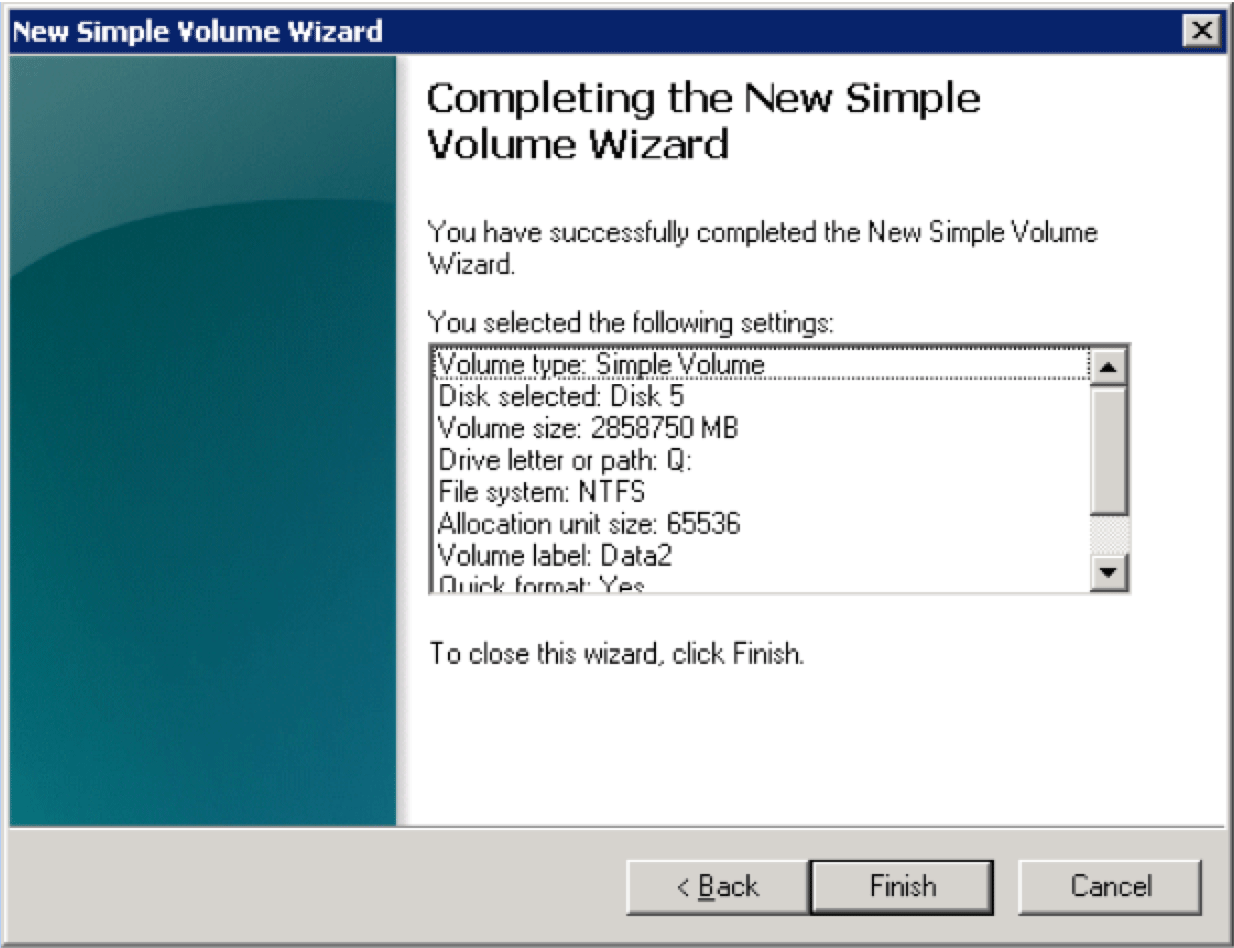
- Create one LUN at a time, then go to Logical Disk Manager to create/format the drive
- This way you won’t get confused about which one is which
- Create the arrays and LUNs in the order shown below
- General PERC Settings in Dell OMSA
- Use intelligent Mirroring for RAID 10 arrays
- No Read Ahead Cache
- Enable Write-Back Cache
- Cache Policy should be enabled
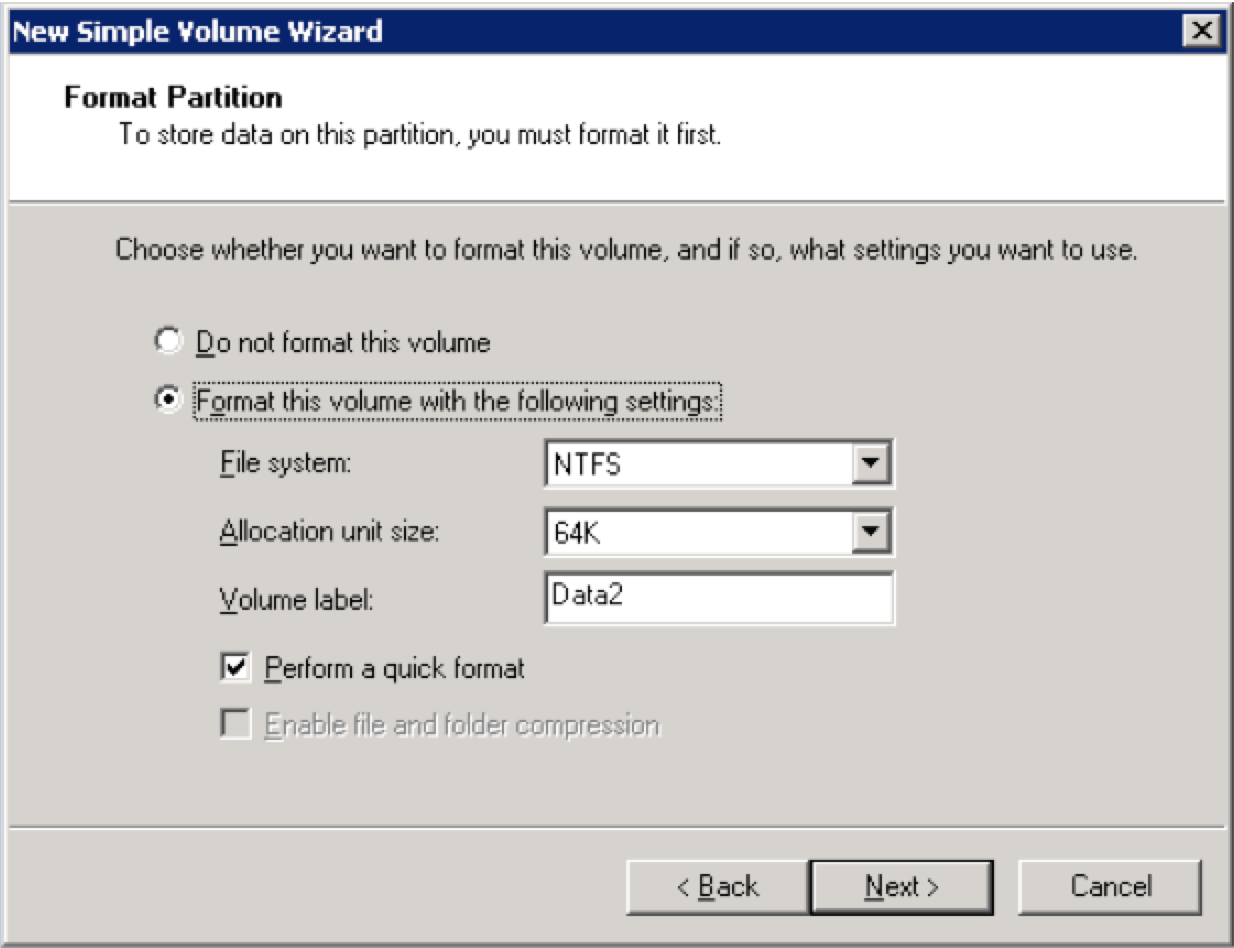
- Use 64K allocation unit
- Create one LUN at a time, then go to Logical Disk Manager to create/format the drive
- Use the Windows Logical Disk Manager to create Logical Disks
- Data drives: SQLData
- Log drives: SQLLogs
- TempDB drives: TempDB
- Backup drives: SQLBackups
- Perform Volume Maintenance Tasks
- YourDomain\SQLServerServiceAcct
- Lock Pages in Memory
- YourDomain\SQLServerServiceAcct
- Make sure there are no pending reboots or else SQL Server 2012 will not install
- Only install the SQL Server 2012 components that are required for this instance
- Use Mixed Mode authentication
- Set the sa password to a strong password
- Add yourself as a SQL Administrator
- Add any other DBAs who need to be administrators
- Use YourDomain\SQLServerServiceAcct for the SQL Server Service account
- The password is: xxxxxxxxx
- Use YourDomain\SQLServerAgentAcct for the SQL Server Agent account
- The password is: xxxxxxxxx
- Set the SQL Server Agent Service to Automatic startup
- Set the default directories to the appropriate drive letters and paths
- User database directory: P:\SQLData
- User database log directory: L:\SQLLogs
- Temp DB directory: T:\TempDB
- Temp DB log directory: T:\TempDB
- Backup directory: N:\SQLBackups
- Or the latest released Service Pack for SQL Server 2012
- The cumulative update is available from this location:
- http://support.microsoft.com/kb/2874879/en-us
- Make sure to get the x64 version of the update package
- Manually defragment the C: drive after installation
- This is not necessary if you are using SSDs
- Enable optimize for ad hoc workloads
- This will allow SQL Server to use less memory to store ad hoc query plans the first time they are executed
- Set Max Degree of Parallelism to the number of physical cores in a NUMA node on your server
- Enable Default Backup Compression
- This will use SQL Server backup compression by default for all database backups
- This will suppress logging of successful database backup messages in the SQL Server error log
- This will help allow SQL Server to send e-mail notifications for SQL Server Agent Alerts and when SQL Server Agent jobs fail
- This value depends on how much physical memory is available in the server
- It also depends on what SQL Server components are installed
- Here are some example values:
- 96GB Total RAM: Set Max Server Memory to 87000
- 64GB Total RAM: Set Max Server Memory to 56000
- 32GB Total RAM: Set Max Server Memory to 27000
- All TempDB data files should be 4096MB in size
- Set Autogrow to 1024MB
- Use DBAdmin with an e-mail address of dbadmin@yourcompany.com
- Right-click on Database Mail and send a test message
- YourServerName Alert – Sev 19 Error: Fatal Error in Resource
- YourServerName Alert – Sev 20 Error: Fatal Error in Current Process
- YourServerName Alert – Sev 21 Error: Fatal Error in Database Process
- YourServerName Alert – Sev 22 Error Fatal Error: Table Integrity Suspect
- YourServerName Alert – Sev 23 Error: Fatal Error Database Integrity Suspect
- YourServerName Alert – Sev 24 Error: Fatal Hardware Error
- YourServerName Alert – Sev 25 Error: Fatal Error
- YourServerName Alert – Error 825: Read-Retry Required
- YourServerName Alert – Error 832: Constant page has changed
- YourServerName Alert – Error 855: Uncorrectable hardware memory corruption detected
- YourServerName Alert – Error 856: SQL Server has detected hardware memory corruption, but has recovered the page
- Make sure each agent alert has a response to notify the DBAdmin operator
- DBCC FREESYSTEMCACHE ('SQL Plans');
- Runs every night at 12:00AM
- http://ola.hallengren.com/
- Open the MaintenanceSolution.sql script while connected to the instance
- Modify the @BackupDirectory variable to N:\SQLBackups
- Run the script to create eleven new SQL Server Agent jobs
- For each job, go to the Notifications property window and have the job e-mail the DBAdmin group if the job fails
- For each job, create a schedule for when it will run.
- Here is a suggested schedule for the jobs:
- CommandLogCleanup Sunday at 12:00AM
- DatabaseBackup – SYSTEM_DATABASES – FULL Daily at 11:55PM
- DatabaseBackup – USER_DATABASES – DIFF Daily at 12:00PM
- DatabaseBackup – USER_DATABASES – FULL Daily at 12:00AM
- DatabaseBackup – USER_DATABASES – LOG Hourly
- DatabaseIntegrityCheck – SYSTEM_DATABASES Saturday at 7:55AM
- DatabaseIntegrityCheck – USER_DATABASES Saturday at 8:00AM
- IndexOptimize – USER_DATABASES Sunday at 8:00PM
- Output File Cleanup Sunday at 12:00AM
- sp_delete_backuphistory Sunday at 12:00AM
- sp_purge_jobhistory Sunday at 12:00AM




Very nice, thank you. I'm catching up with some of the items right now!
Do you really recommend clearing the plan cache every night? Why?
How about trace flags 4199 and 3042? 4199 is a general optimizer flag and 3042 stops compressed backups from giving you a full backup and then compressing once the backup is finished.
I only recommend clearing the ad-hoc plan cache, which often has a large number of single-use plans or plan stubs in the cache, even with "Optimize for ad hoc workloads" enabled.
@Chris Wood, be aware that 3042 reduces performance because the bak file has to grow repeatedly until it has reached its final size. SQL Server compresses immediately in all cases. Just the preallocation is disabled with this flag.
tobi,
Thats something I didn't know. Where did you get that info from? Joe Chang recently blogged about the need for controls in backup compression just like the 3rd parties provide http://sqlblog.com/blogs/joe_chang/archive/2013/11/07/backup-compression-time-for-an-overhaul.aspx
https://www.google.com/webhp?complete=1&hl=en#complete=1&hl=en&q=sql+server+trace+flag+3042
then: http://blogs.msdn.com/b/psssql/archive/2011/08/11/how-compressed-is-your-backup.aspx
I had the suspicion that this was true because compressing after exporting just doesn't make sense from an implementors point of view. Why would it be done that way?! Seems to have no upside. Also, it would require a temporary file which I have never observed. Before answering you I looked it up though.
Hi Glenn,
Thanks for a great article. Below are a few questions:
1. Shouldn't we have the number of tempdb files equal to the number of logical CPUs?
2. Would it be a good idea to enable 'Forced Parameterization' to improve query performance?
Cheers,
Shankar
Setting the number of tempdb data files to the number of logical or physical CPU cores is outdated guidance. Per Bob Ward at Microsoft, I think it is much better to start at four or eight tempdb data files, and then to monitor for any signs of allocation contention in tempdb, possibly adding more data files if necessary.
Forced parameterization can hurt query performance in some cases, so you really would want to test it with your workload. I would definitely not enable it as a default setting for a database.
Hi Glenn,
Thanks for the clarification.
On the sizing of tempdb files(data & log), do the sizes 4096M & 1024M have any significance?
In case of an instance with a single small user database say 10G, would it be still apply?
Cheers,
Shankar
Shankar,
Unless you are really worried about disk space, having your tempdb data and log files start out much smaller really does not make that much sense. You want to try to avoid having the tempdb data and log files having their autogrow kick-in during normal usage if possible.
Hi Glenn,
Very comrehensive writeup!
The only alternation for me would be splitting the multiple TEMPDB data files over different LUNs\drives if available
Cheers
Felix
Thanks Glenn. Bookmarked. I will see what I can take from your checklist and add them to mine.
Just a few other things on my list.
Verify disk alignment or get server and storage guys to confirm
Verify compressed volume is not used
Increase number of error log and set up job to recycle it
Enable remote admin connection
For vitual machines, on host:
VM-VM Affinity Rules should be applied to ensure “Separate Virtual Machines” is selected
Enable Strict Enforcement for Affinity Rules. Specifically “ForceAffinePoweron” option is set to type 1
DRS should be set to Partially Automated
Pass-through RDM (physical compatibility mode)
Reserve all guest memory (All locked) is checked (for particular vm)
The sizes are probably just baselines or starting points. You want to avoid having TempDB grow so if those sizes are not sufficient, then adjust accordingly. On the contrary, they may be large for your environment – I have some instances where 2GB data files are fine.
Why "Change the windows page file size to 16GB, using the C: drive", This seems to be a hard value. Should it not be configured in line with OS Memory ?
I go with the 2GB recommendation and it's worked for me. 16GB is a bit large IMO.
http://www.brentozar.com/archive/2008/03/sql-server-2005-setup-checklist-part-1-before-the-install/
Letting Windows just use the default setting for the Windows Page file is a large waste of disk space. If a database server is using the page file, things are going very badly from a memory management perspective.
There is no real problem with going smaller, as long as it is big enough for a minidump.
Agreed Glenn – great post though. I appreciate your efforts on sharing this!
For sure – I've had pagefiles bloat to 1/2 the size of my disk, which is typically just 50GB for the OS/C: drive. We all know Windows Updates will consume a pretty significant amount over time, so that doesn't work. You have to cap it and adjust accordingly.
Great article, question: how would this translate into VM's? More and more that is what we are allotted with.